
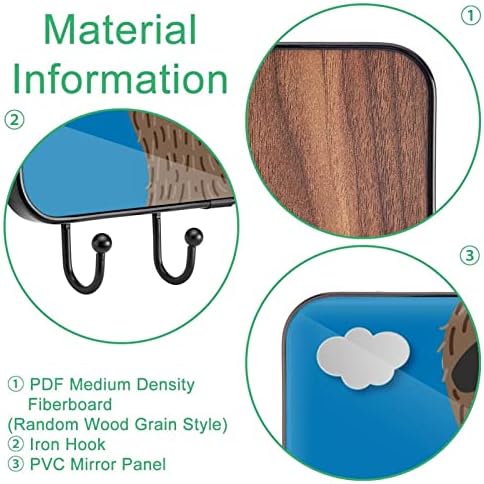
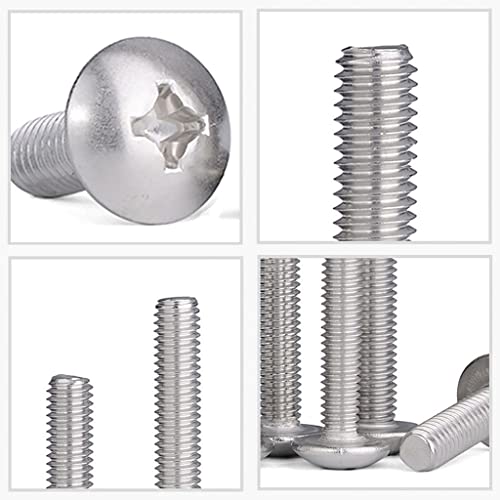
אנו שואפים לספק מוצר באיכות הגבוהה ביותר ואת חוויית הלקוח הטובה ביותר, אם אתה לא מרוצה לחלוטין, אל תהססו לפנות אלינו בכל עת תוספות חוט מוחלות על חומרים הנדסיים בעלי חוזק נמוך כמו סגסוגת אלומיניום, סגסוגת אבץ, סגסוגת, נחושת, פלסטיק, פלסטיק הנדסי וכו'. ישפר את חוזק החוט. מוסיף חוט יפיק גבוהכוח, גבוהדיוק חוט נקבה סטנדרטי אם אתה מתאים את בורג חוט להגדיר חור בורג של לחומר של סגסוגת אלומיניום וחומרים אחרים. אתה יכול לתקן את החור המושחל בצורה חסכונית כאשר מתרחשת שגיאת חוט או תיקון חור מושחל נשי פגום; משמש להמרה בין חורי חוט מטרי לאינץ', וזה נוח ומהיר. תוספות חוטים עשויות חוזק גבוה, גבוהדיוק מדויק בצורת מעגל חוט פלדה, הנקרא גם נדן הברגה, שרוולי הברגה מנירוסטה, שרוולי תיל. מפרט : אורך לאחר התקנה : כ.8 במספר הסיבובים לפני התקנה : 16.5 מחוץ קוטר לפני התקנה : כ.5 בקוטר של מקדח קידוח להתקנה : כ.4 כיצד להשתמש : 1. קידוח השתמש במקדח בגודל המופיע בטבלת הפרמטרים של הכנסת חוט החוט כדי לקדוח את החור. היזהר לא לקדוח את החור לצורת חרוט. השתמש ברזים מיוחדים עבור הוספת חוט חוט כדי להקיש. עומק הברז חייב לחרוג מאורך ההתקנה של מוסיף החוט. לאחר הברז, השתמש בתרסיס אוויר דחוס כדי לפוצץ את הפסולת.
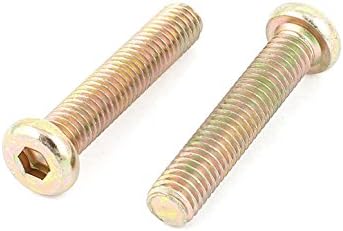
ברגי מכונה מיועדים ליישומים עם חור שהוטל מראש או מזווגים לאום הברגה ברגי ראש סגלגלים סגלגלים ידועים גם כ

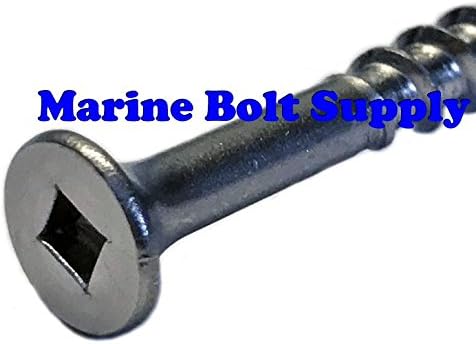
קוטר מגרש חוט : 3 / 8 " 16 / אורך מתחת לראש : 91 / 2 אינץ לסירות, רציפים, מזחים וסביבות מאכלות אחרות נקראים ברגי

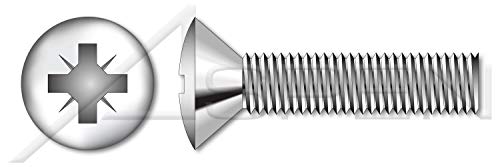
קוטר : # 6 אורך : 21 / 4 סנטימטרים גימור : פוספט שחור סגנון ראש : חצוצרה (#2 פיליפס קצת) אנו מלאי מגוון רחב של מחב

מידות חבילה : 6 ליטר על 038 שעות על 4 וואט (אינץ') ארץ מוצא : ארצות הברית מספר חלק : 3008312 מידות חבילה : 6 ליטר על 0.3
ברגי כובע משושה (נקראים גם ברגי כובע ראש משושה, בריח משושה או בורג ראש משושה) המיוצרים למפרט ASME B18 כולל ראש
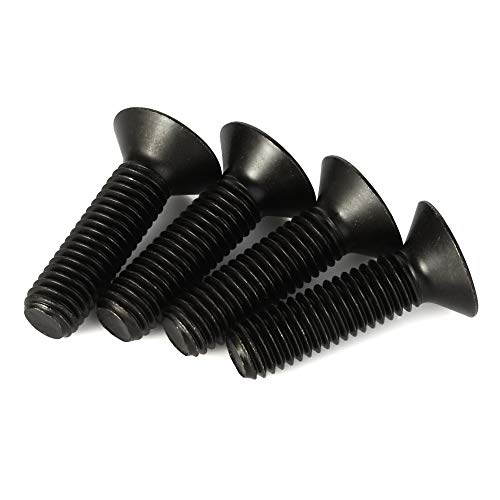
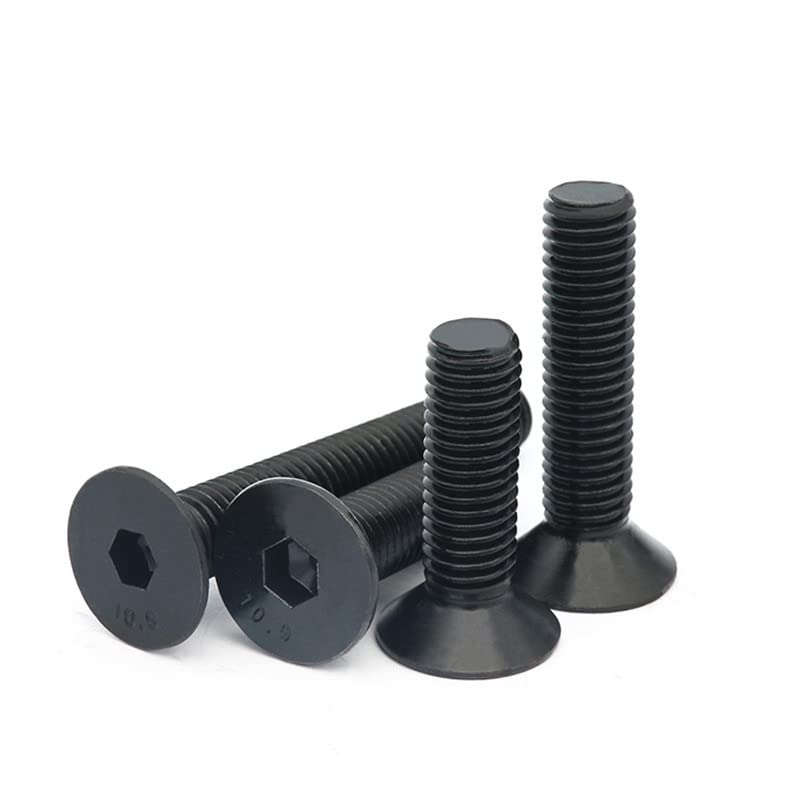
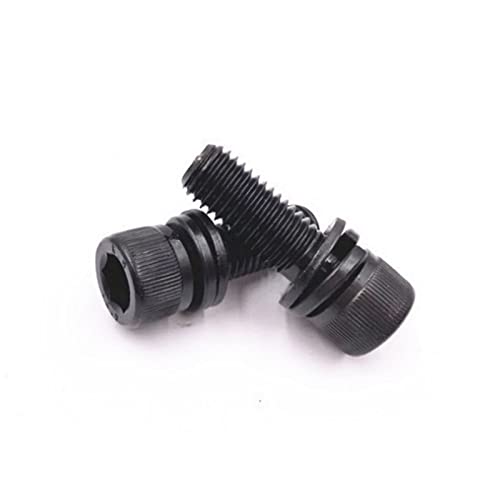
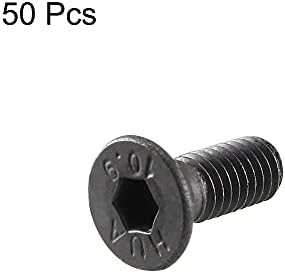
סוג מוצר : שטוח ראש שקע כובע בורג; מערכת של מדידה : מטרי; מפרט : דין 79919 שחור סגסוגת פלדה.5 מ מ; בורג אורך : 6 מ מ

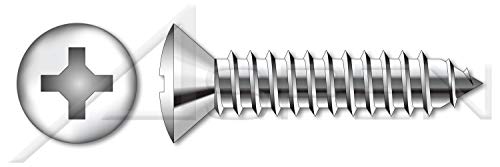
שרשור : גס / חוט מלא / מארז מוקשה / תחמוצת שחורה קוטר חוט : 1 / 420, אורך : 1 אינץ ' תחמוצת שחורה אינה גימור מגן

אגוזים בורג מכונת משושה אלקטרו אבץ מצופה פלדה & גימור ברור ספינה מארצות הברית אנא קרא את התיאור שלהלן לקב

188 נירוסטה עם גימור תחמוצת שחור שחור תחמוצת מספק קורוזיה הגנה כדי למנוע חלודה שחור תחמוצת 188 נירוסטה משמש

מחיר ל : כל קשיות רוקוול : C43C50 פריט : חוט הכנס סלילי כיוון : יד ימין יישום : עבור מתכת : חוזק חוזק מתיחה סלילי
ידוע גם כברגים להקיפה עצמית, אלה משמשים לרוב ביישומי מתכת דקים של גיליון מד ברגי ראש סגלגלים סגלגלים ידו�
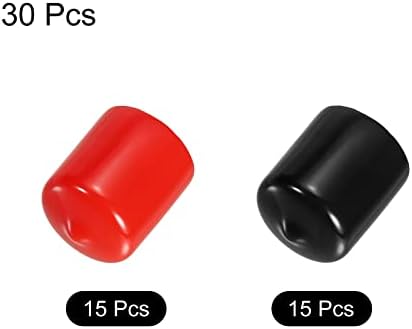
מכסי קצה הגומי הגמישים נמצאים בשימוש נרחב עבור מגיני חוט בורג, מכסי בריח, צינור מתכת וכיסוי קצה צינורות צ

ברגי מכונה הכוללים מערכות כונן של 6 אונות (המכונות גם Torx, Star) אינן יוצרים כוחות קמאו כדי לדחוף את הנהג כלפי
גודל מס '8 (320" קוטר ראש, כונן מס' 2 מרובע, חור טייס 5 / 64 " כל החבילות מסומנות בהתאמה אישית וחום נפרד על ידי אספ�

בורג מתגלגל חוט מומלץ לשימוש במתכת פלדה משמשת לעתים קרובות ביישומים שבהם כוח הוא השיקול העיקרי...
חומר : 304 נירוסטה ברגים אלה עומדים במפרט ISO7380 בשימוש נרחב בעץ, ריהוט, ציוד חשמלי, צעצועים, אלקטרוניקה, מכשי�
המוצר הוא בורג 5 קילוגרם 2 ערכת שימוש קל ופשוטה המוצר מיוצר בסין משם המותג : Hillman Fasteners המוצר הוא בורג 5 קילו

ברגי כובע משושה (ברגי ראש משושה) בורג כובע העשוי מפלדת פחמן בינונית ומטופל בחום יחס התשואהמתיחה הוא הנמו�
מידות : M4 X16 מ"מ, צבע : 100 יחידות אספקת DIY : עבודות מתכת מקור : סין היבשתית חומר : סגסוגת אלומיניום...

5 / 16 " משושה ראש פיגור בורג בורג ראש משושה עם חוט חלקי והקשה עצמית ראש משושה עם חוט חלקי והקשה עצמית חוט חד

קוטר : 10 מ"מ סגנון ראש : Hex (#16) סגנון ראש : Hex (#16) אנו מראים מגוון רחב של מחברים אידיאליים ליישומים רבים נוגעי�

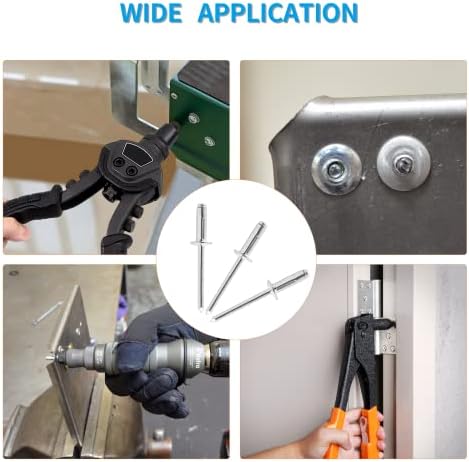
ראש כיפה מסמרות עיוורות כל האלומיניום מיוצר למפרט SAE J933 גוף : סגסוגת אלומיניום סיכה : סגסוגת אלומיניום מס

ברגי משושה כוללים ראש בן שישה צדדי, המיועד להידוק באמצעות מפתח ברגים או מקדחה השתמש באגוזים וכביסה מאותו
החבילה כוללת : 250 יח 'ברגי כובע ראש שקע פלדה סגסוגת M8 x 125 מ"מ (המגרש) x 30 מ"מ, אורך בריח : 30 מ"מ, M8 x 1.25 מ"מ אורך בו�
אנא עיין במפרט בטבלה שלהלן לקבלת פרטים מלאים אם יש לך שאלות או ספקות, או אם הדרישות שלך כוללות מידות ספצי�
[חומר : ] עשוי מפלדת פחמן באיכות גבוהה אנטירוסט מגולוון, עמידות בפני קורוזיה, המתאימה לשימוש חיצוני לטווח
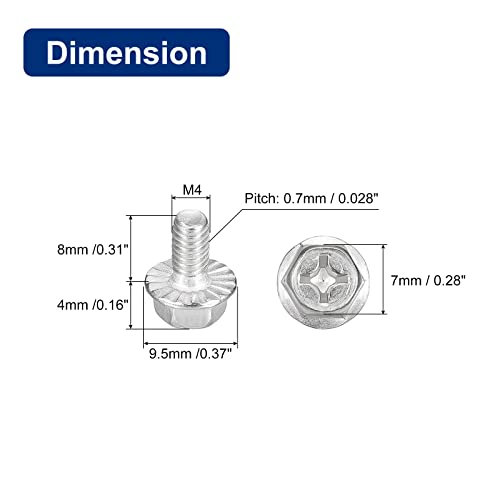
גודל חוט מטרי M4 (4 מ"מ) ; קוטר חוט : 4 מ"מ; גודל החוט : 07 מ"מ; קוטר ראש : 8.6 מ"מ; גובה ראש : 2 אורך בורג : 40 מ"מ (נמדד מ�

עובי לוח תפיסה (פנימה) : 0 אורך מסמרת (פנימה) : 0 קוטר אוגן (פנימה) : 0 קוטר מסמרת (פנימה) : 5 / 32 קוטר החור (פנימה) :

התקשה וקרקעית קוטר סיכה נומינלי : M25 אינץ ' אורך סיכה נומינלי : 120 מ"מ אינץ ' מיוצר כדי לעמוד במפרט ASME B18 קוטר
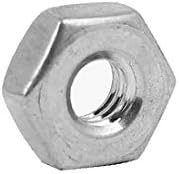
גודל חוט : #256; שם מוצר : אגוז משושה חומר : 304 נירוסטה; משקל : 10 גרם חבילת תוכן : 50(+ / 2%)יחידות אגוז משושה; ראשי צ�

עגול מחורץ מיוצר ל ASME B18.3 ו SAE J82 מפרט מיוצר ל ASME B18.3 ו SAE J82 מפרט אטב של שוק ישר עם חוטים חיצוניים שנועדו לעבו

פגרת כיכר פאן עצמי קידוח ברגים מיוצר לאסמה ב18.3 (ראשים) ומידות סאי ג ' 78 410 נירוסטה מוקשה עצמי קידוח ברגים, #1
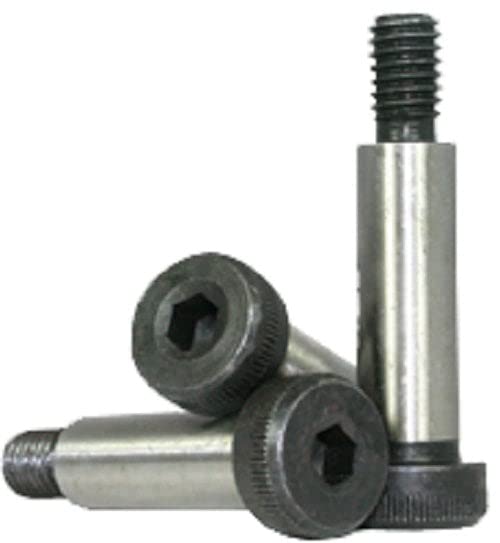
שקע המותג השטן הכחול ברגי כתפיים / U כל הפריטים מיוצרים בארה"ב המיוצרים למפרט AMSE B18.3 / חוטי Class 3 A...

גודל חוט : 8 מ"מ / 03" (ד); שם מוצר : אגוז משושה חומר : 304 נירוסטה; משקל : 223 גרם חבילת תוכן : 50(+ / 2%)יחידות אגוז משו�
חומר : ברגי אוגן ראש פיליפס משושה עשויים 304 נירוסטה, חוזק גבוה, עמיד בלאי, אנטירוסט ואנטי קורוזיה יישום : ב�
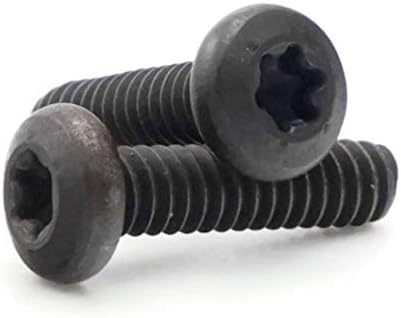
מכונת ראש כונן כוכב ברגים מפלדת אל חלד תחמוצת שחורה #540 כונן כוכב (6 אונה) סגנון כונן יכול למנוע הפשטה בשוג�
✿ איכות גבוהה 4 ערכת מגוון מפלדה מצופה אבץ עם אבץ ✿ חומר : אגוזי ה T העשויים מפלדת פחמן באיכות גבוהה, פני ה�

חוט קפיץ פחמן גבוה עיצוב נעילה עצמית הופך אותו לבטוח יותר מסיכת שיער רגילה חווה, מדשאה, גן ויישומים אחרים

שרשור : גס / חוט / מטרי כיתה 149 45 שעות / תחמוצת שחורה מפתח מפתח של שקע hex hex מומלץ : 6 (מטרי) קוטר החוט : M121.75, �
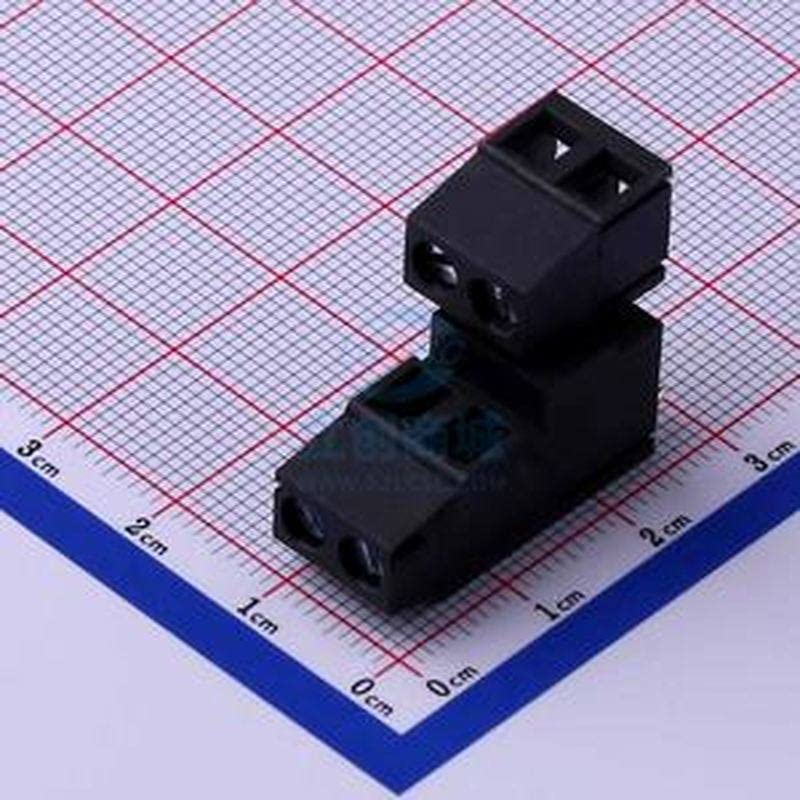
2 PCS 508 מ"מ מספר שורות : 2 מספר סיכות לשורה : 2 סיכות ישרות 2 סטים של מסופי בורג P = 5.08 מ"מ DB128 A5.08 מ"מ מספר שורות : 2
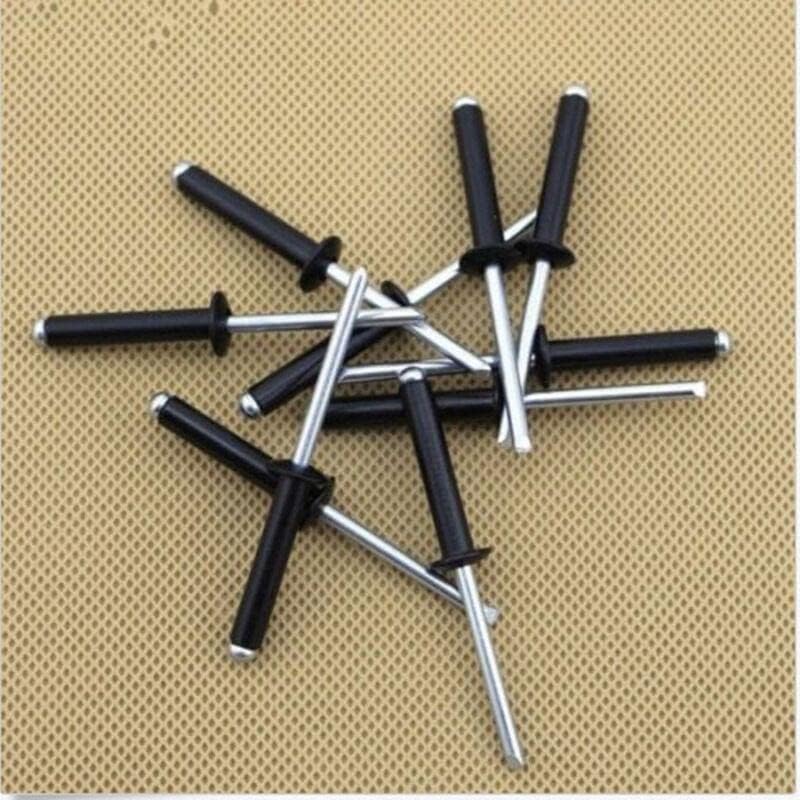
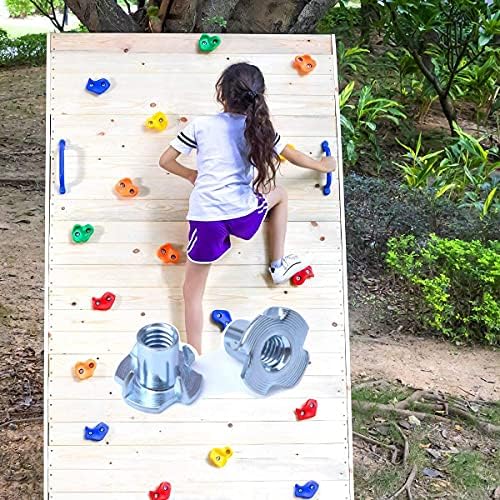
*רשימת חבילה : החבילה מכילה 60 יחידות סירת מסמרות גריפ קוטר הוא 5 / 32 אינץ, גריפ אורך גודל הוא 5 / 8 אינץ, גריפ ט

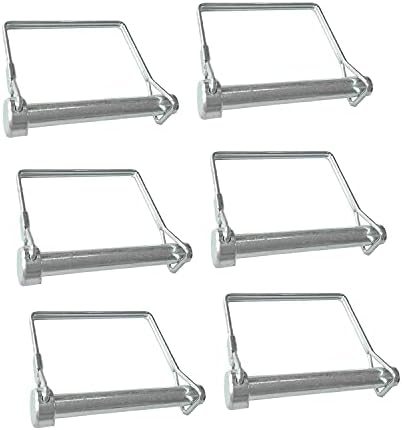
סוגים משליכים כוללים חור מושחל ברגים מקבילים מתאים לחור סיכת המסולל להסרה קלה סגנונות משיכה סטנדרטיים כ
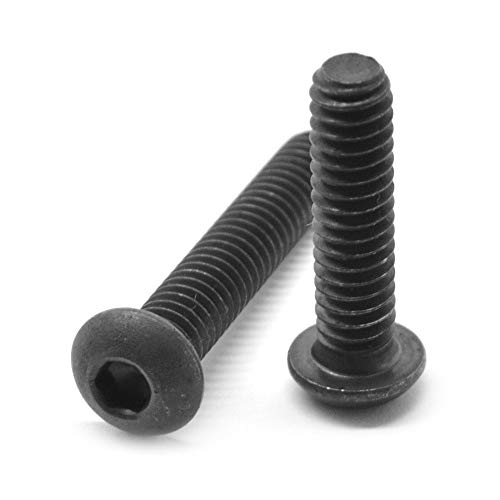
סוג כונן : שקע משושה; סגנון ראש : ראש עגול; חומר : מתכת תוכן חבילה : בורג כובע שקע משושה 5 x; שם מוצר : בורג כובע
סגנון ראש : ראש שטוח, ראש שקוע; חומר : 109 פלדת פחמן; חבילת תוכן : 50(+ / 2%)יח ' ברגי שקע משושה שקועים שם מוצר : ברג�

קוטר מגרש חוט : M6 100 / אורך מתחת לראש : 40 מ"מ חוט גס / מושחל חלקית 188 ברגי כובע משושה נירוסטה מציעים הגנה מפ